Checkify.so
Connect Notion
To create to-do lists using Checkify.so, the first step is to connect Notion to Checkify.so. Here's a step-by-step guide to doing it.
- Sign up for a Checkify.so account with your Google account if you haven't already done so. Logging in is the same as signing up.
- This will take you to the home page. If it does not redirect, you can go here.
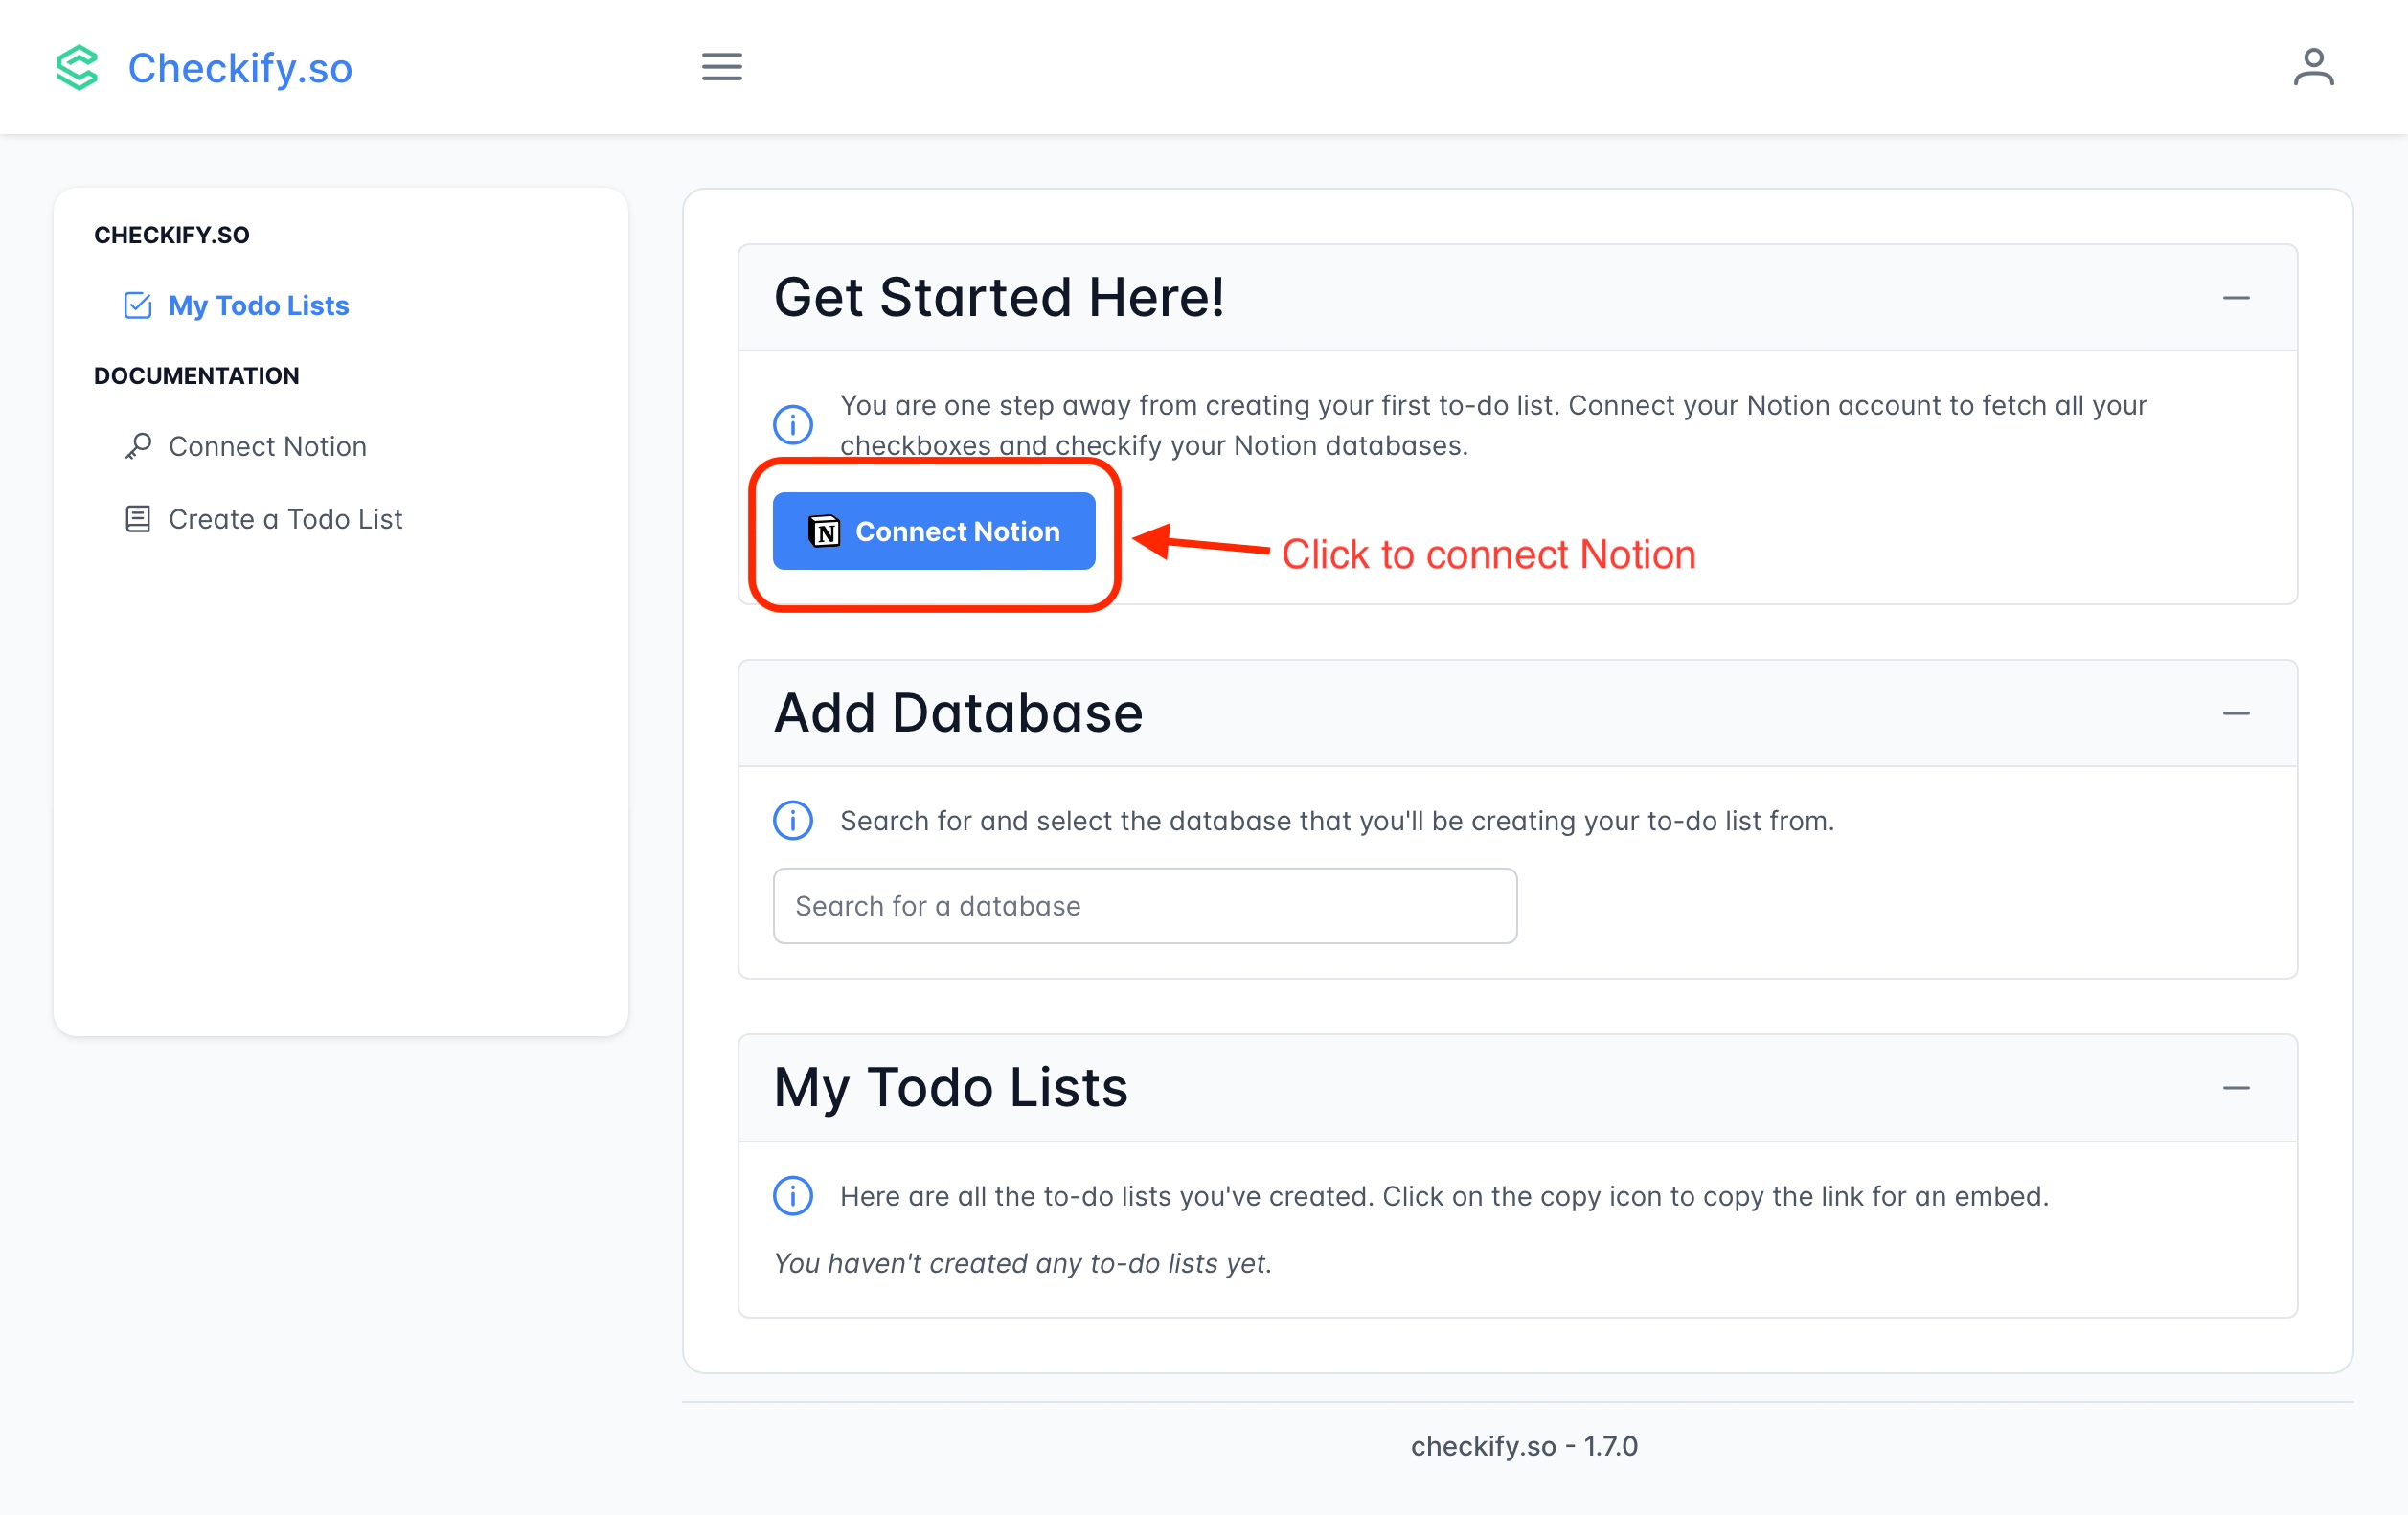
- Click the "Connect Notion" button on the Checkify.so home page. This will redirect you to a Notion Authorization page.
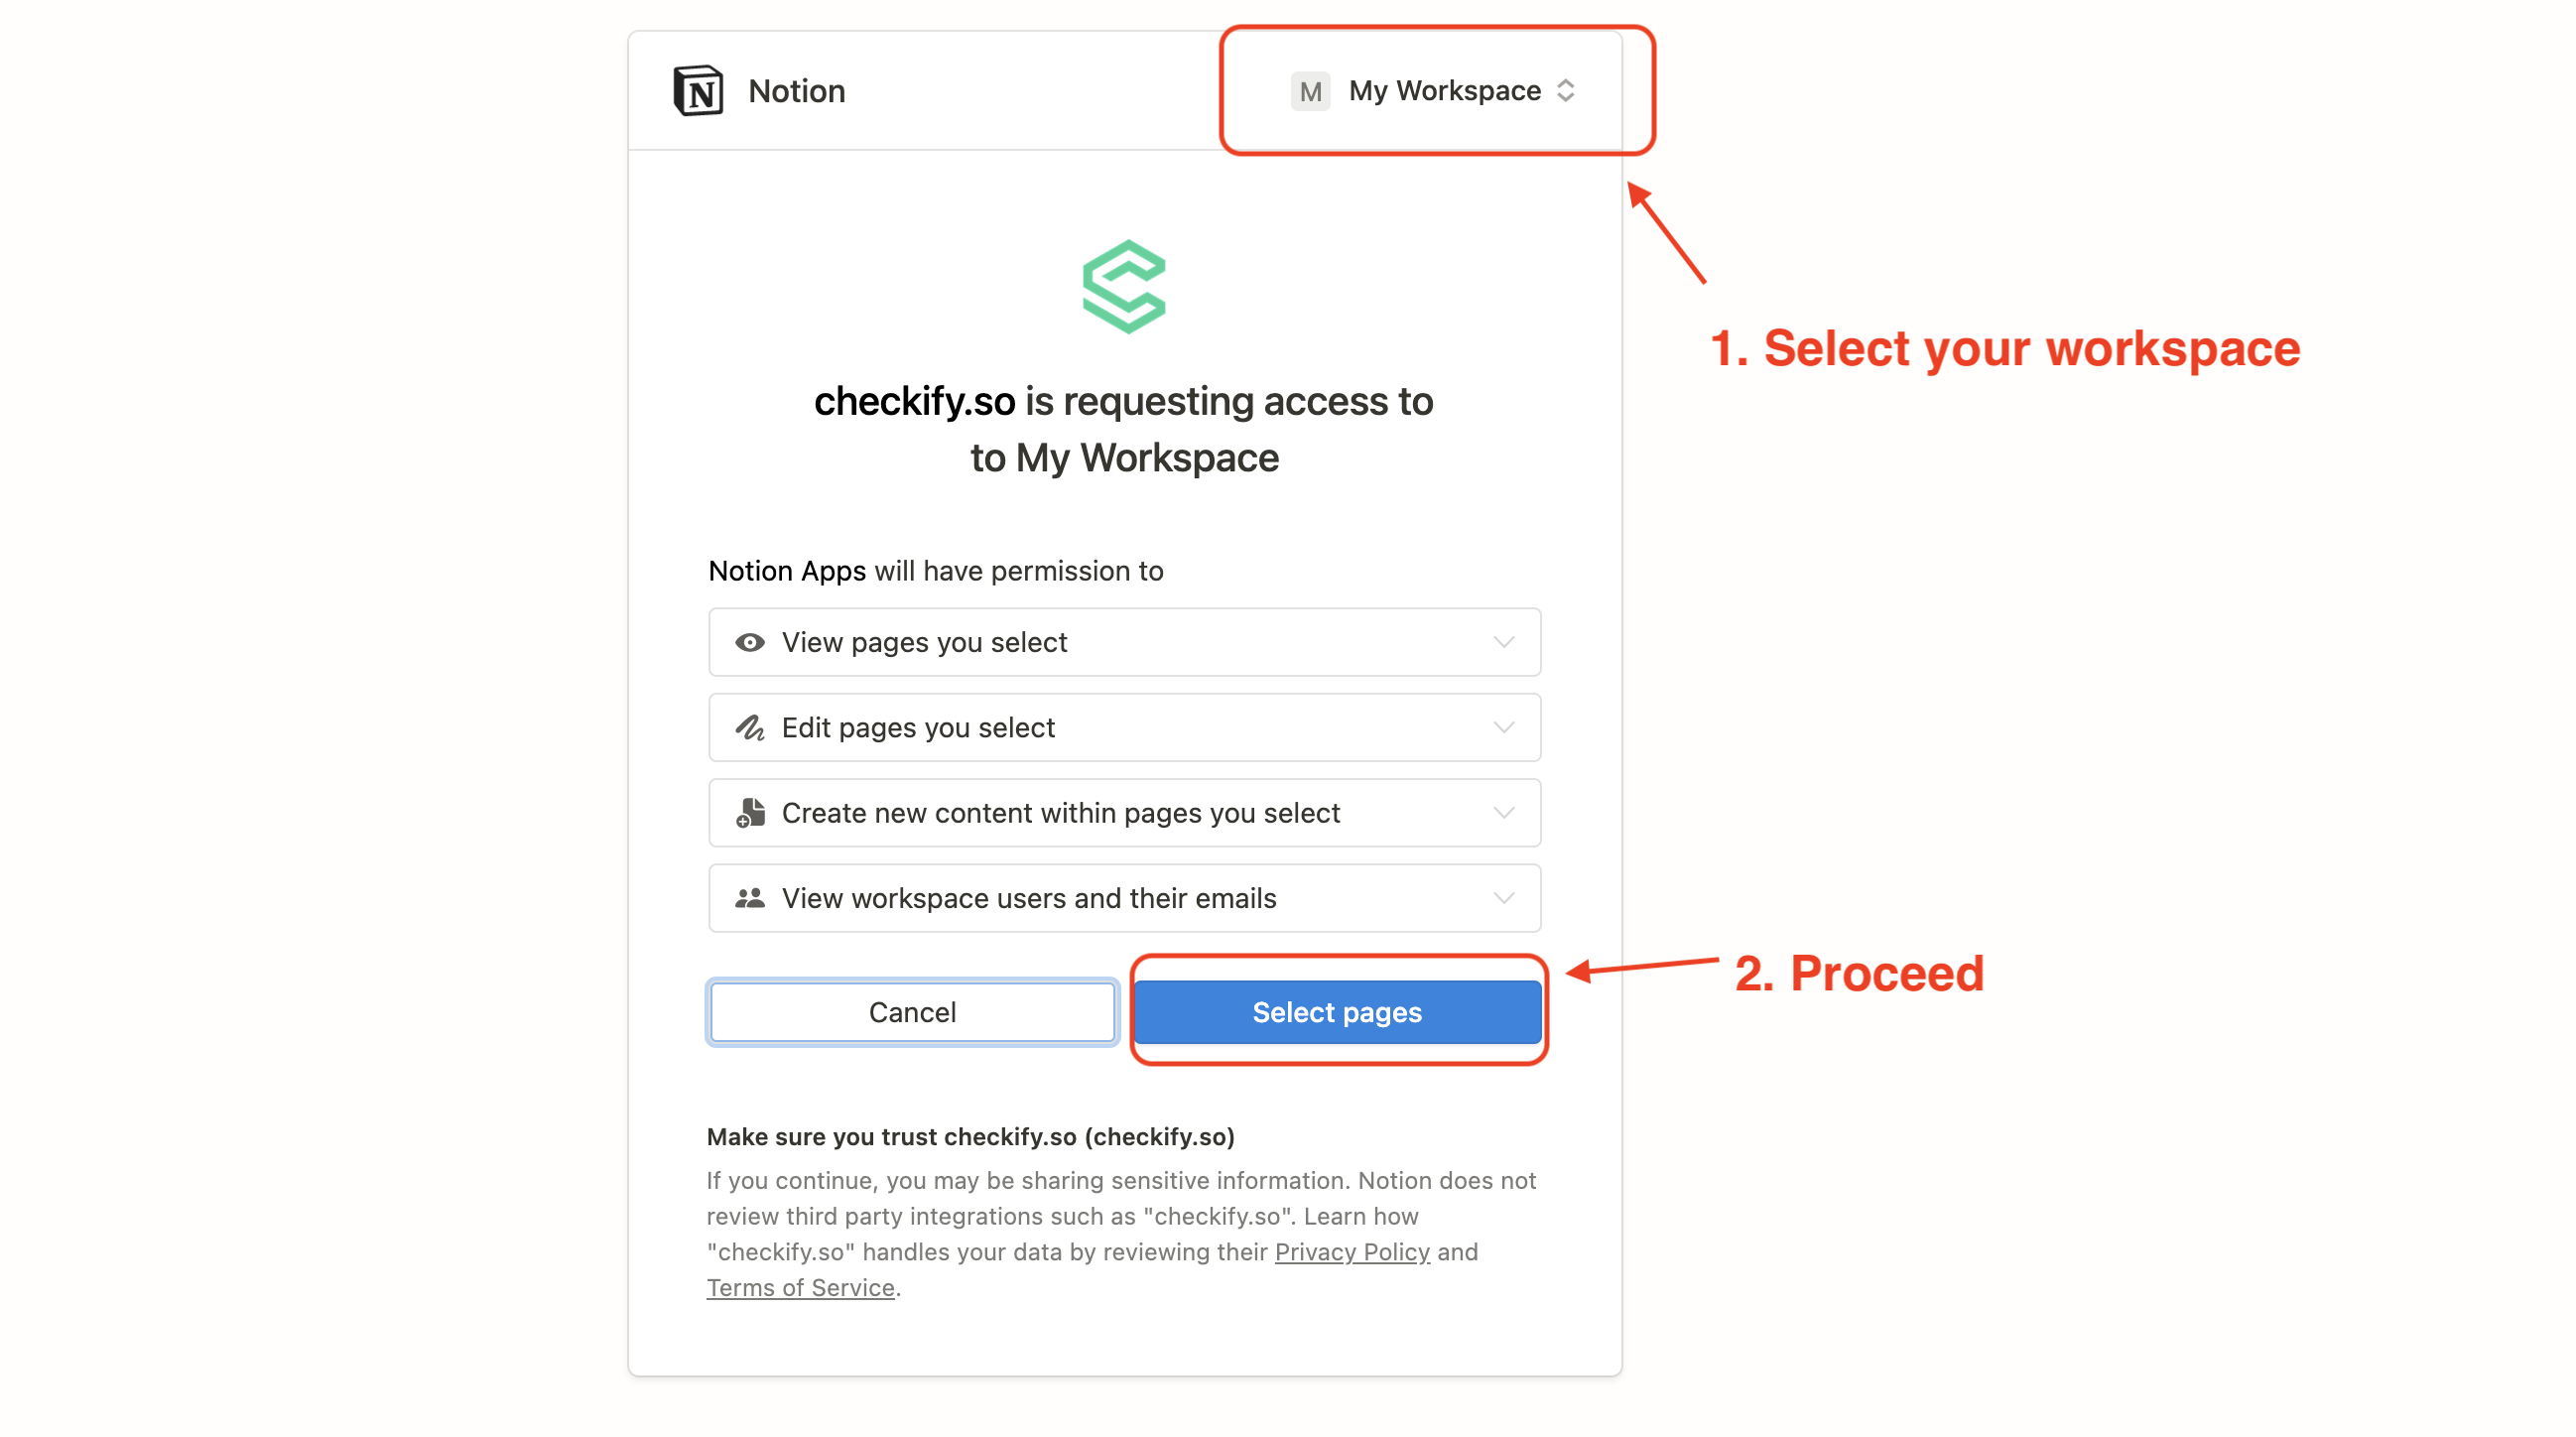
- On the Notion Authorization page, select the workspace and top-level pages that contain the databases you want to use to create apps.
NOTE
If you're not able to see a Notion workspace on the Notion authorization page, it might be because you are not a member of that workspace. Only members of a workspace can authorize integrations for that workspace. If you're a guest in the workspace, you won't be able to see it on the authorization page. If this is the case, please ask the workspace owner to add you as a member.
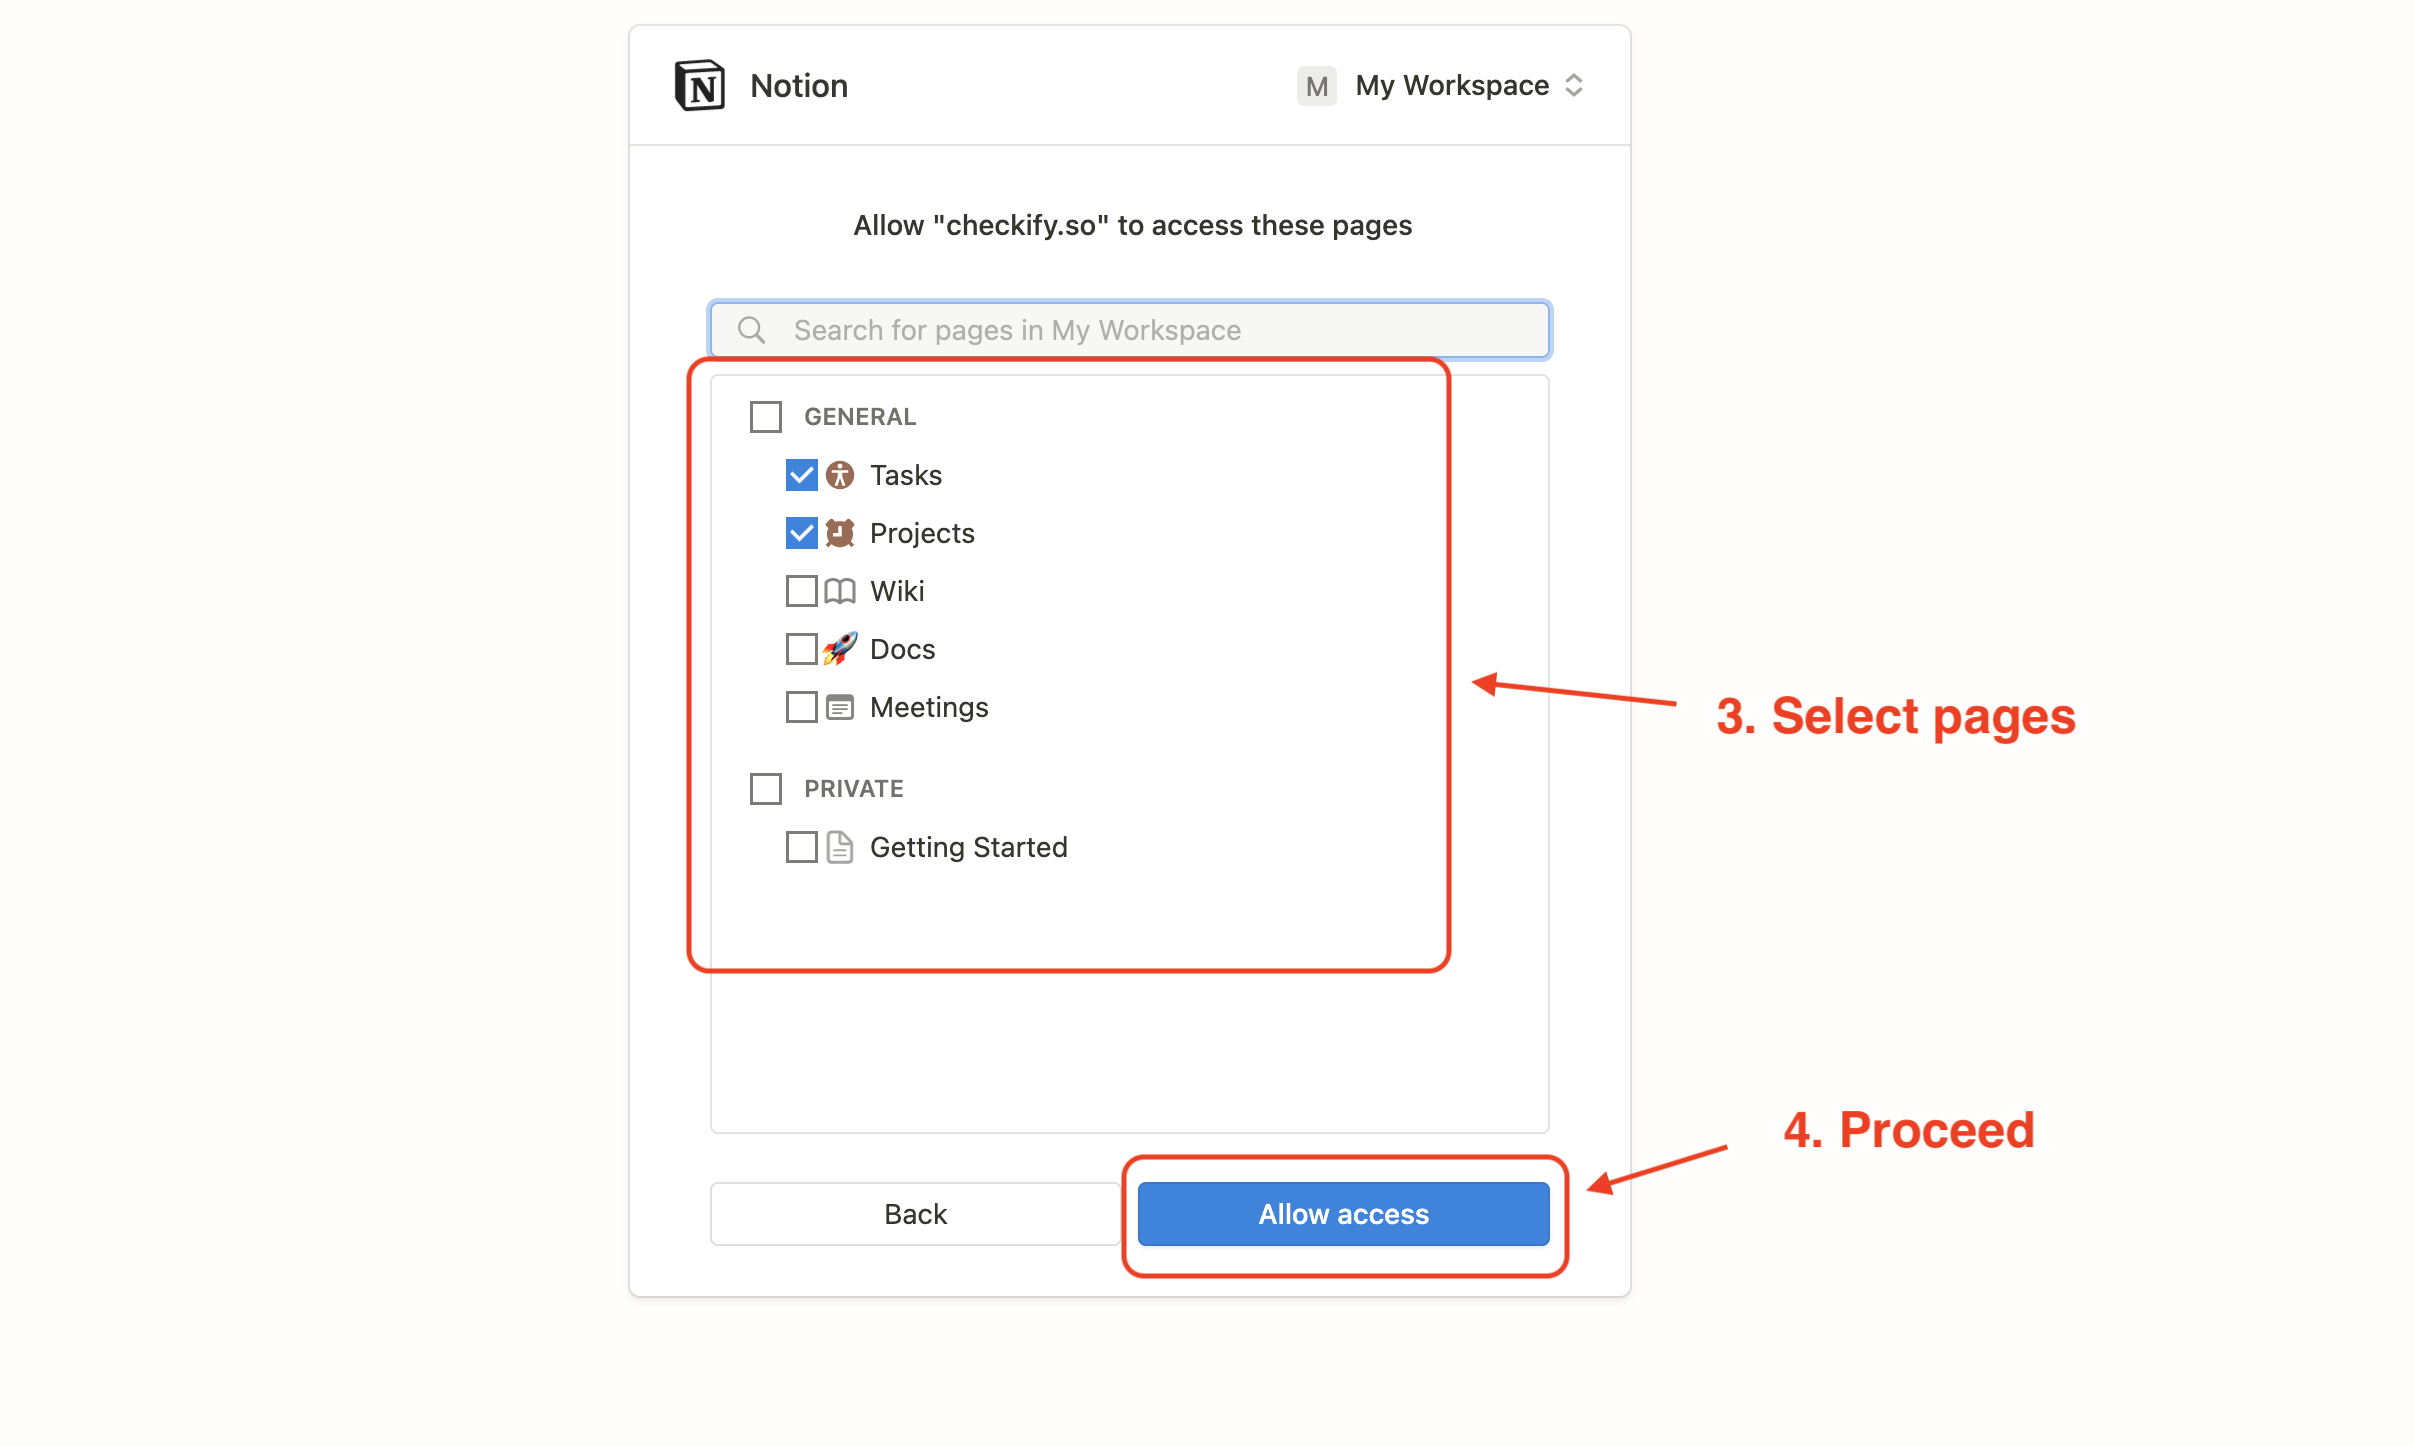
- Grant Checkify.so permission to access your Notion account by clicking the "Allow Access" button.
That's all! You should now be able to connect your Notion database(s) to Checkify.so.
Next Steps
After connecting Notion:
- Create Todo Lists: Select databases containing checkboxes to track
- Sync Checkboxes: Toggle checkboxes in Checkify and they'll update in Notion instantly
- Sync to Notion Database: Create a centralized database with all your todos (see Sync to Notion guide)
Features Available After Connection
- Real-time Sync: Changes made in Checkify reflect immediately in Notion
- Extraction Metadata: See how many pages and checkboxes were found
- Tier-based Limits: Free users can track up to 25 pages, Pro users 100, Max users 500
- Multiple Databases: Connect and manage todos from multiple Notion databases